House of Blues
42” x 42”
Designed by Heidi
Pridemore
Indigo is one of my
favorite colors. It is bold yet dark and mysterious. Indigo can play the part
of the background or take front and center in a project. For this month’s
project I designed House of Blues and I wanted to make the dark Indigo color the
star of the show. I used my GO
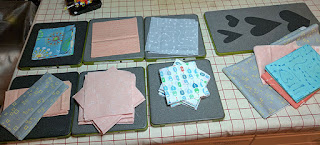
Mix and Match 6” Qube set to make this project quick and easy. The
fabric collection for this quilt is Indigo Dreams from Timeless Treasures. The
mix of soft blues and strong indigo blues was perfect. I used the indigo pieces
in the main areas and the softer colors as the backgrounds. The geometric
shapes reminded me of architecture so I decided to call this quilt “House of Blues”.
For the design, I decided to focus on only the GO! Mix and Match 6” cube for
the blocks. The quilt looks complex but the die cut shapes made it a breeze to
assemble.
For the fabrics, I took
the Indigo Dreams collection and divided it up into lights, mediums and darks.
I envisioned the quilt design, only thinking about the values of each color. The
Whimsical Workshop value tool is
very helpful for this step. When you look through a value tool at a group of
fabrics the tint of the plastic takes the colors out and leaves you with just
the values of the fabrics. You can compare one piece next to another to check
their value.
The pattern for this
month’s project is free from The Whimsical Workshop. You can download the free
pattern at www.TheWhimsicalWorkshop.com along with our past free patterns. We have also included
traditional cutting instructions for this project in the pattern too.
The quilt is made up of four large
blocks made from assortment of units. At the heart of each unit is a Square in
a Square Block. I kept the centers for each the same light fabric and only
changed the outer triangles to four different dark fabrics to keep things
simple. The fabric used for the outer triangles becomes the dominant diamond
patterns in each quadrant of the block.
Next is to make each quadrant of the
block. Here is the layout of one for you to see. Please refer to our free
pattern for the actual instructions and illustrations for assembly. Notice I
used the medium value fabrics for the background. You make the backgrounds from
one or two fabrics or make it scrappy as long as you use fabrics of similar value
for each section.
Once you have each
quadrant of the block completed it is time to lay out the block. Each quadrant
twists around the center square. I explain how to sew this together in detail
in the pattern but also wanted to share step by step photos for this here. At
first glance it may seem indimadating but if you take it one step at a time it
really is quite easy.
Make sure to lay out
all four blocks the same way so when you sew the blocks together the pattern
will continue across the quilt top and the dark fabrics match.
First we will start with the lower
right quarter unit and the center square. Align the square with the upper left
corner of the quarter unit. Starting at the top of the square, sew the square
to the quarter unit, STOPPING halfway down. Press towards the quarter unit. If
you do this step correctly the rest of the block just pops together.
Next align the upper right quarter unit
to the top of the sewn pieces. Sew in place and press towards the quarter unit.
Now align the upper left quarter unit
to the left side of the sewn pieces. Sew in place and press towards the quarter
unit.
Next align the lower left unit to the
bottom of the upper left quarter unit/center square of the sewn pieces. Sew in
place and press towards the quarter unit.
Finally finish sewing the very first
seam to complete the block. Easy Peasy!
For the borders, I wanted to carry the
dark blue to the edge of the design so I designed a checkerboard border to
showcase the contrast in the fabrics using only lights and darks. Then I framed
the checkerboard border with two different medium color borders. You will see
in the photo below I did use four fabrics for my backgrounds since I was
working with smaller pieces of fabrics and honestly did not have enough to do
just two different backgrounds. I wanted to show how it looks with two
backgrounds (image above and on pattern) and four backgrounds.
This pattern has so many ways to change
it up. Change the colors, flip-flop the values placements, make it scrappy or
just use black and whites. I hope you have fun playing with these variations.
As always please send along your projects to us at info@thewhimsicalworkshop.com
and we can add you to our bragging rights page on our website.
Make
sure to visit my blog each month where I will share with you some tips and
tricks on cutting and assembling of the project of the month along with posting
the free pattern on our website The
Whimsical Workshop You can also see
our pattern and post at www.accuquilt.com
Until next time…..
Heidi


